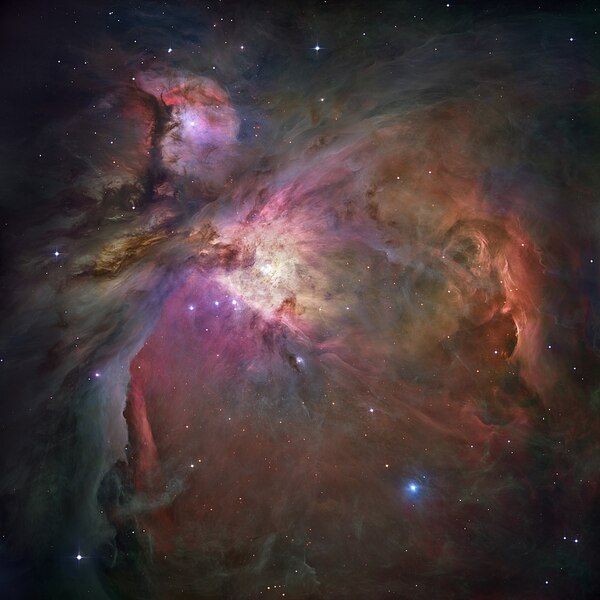
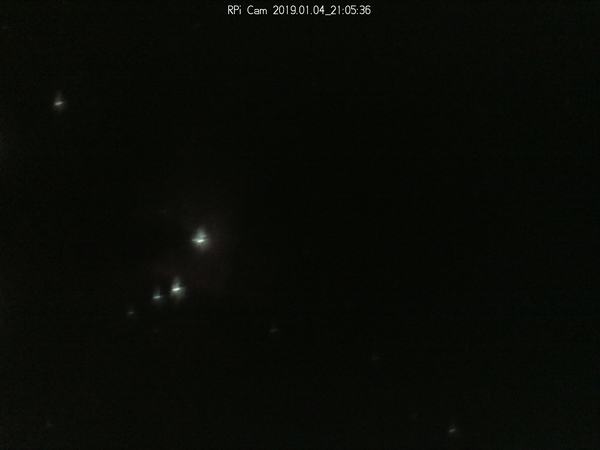
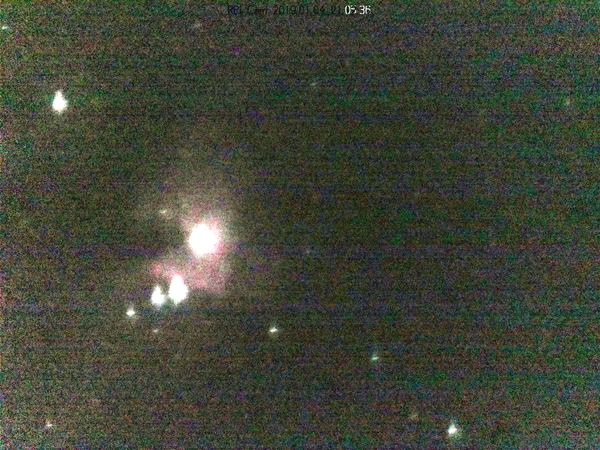
On Friday night I took some photographs of the Orion nebula with my motorised PiKon telescope from my back garden. There is lots of light pollution around, but this is the final image I got:
It's not a very good image of the Orion nebula, but it is substantially better than I was able to get from a single unprocessed exposure.
Disclaimers: I don't actually know anything about astrophotography. I don't know if I'm using the correct terminology. I don't know if I'm using the correct technique. This is just what I managed to figure out from first principles and a little research.
The Orion constellation looks like this:
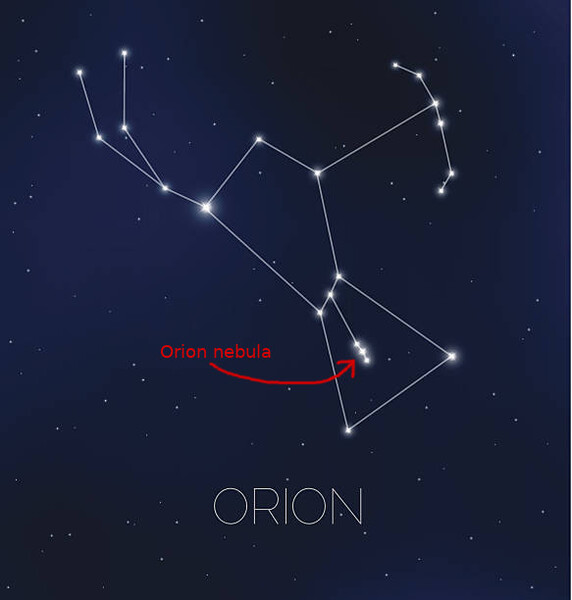
The Orion Nebula (Messier object 42, or "M42") is a nebula in the Orion constellation. The Deep Sky Videos YouTube channel has quite a good video on M42. To the naked eye the nebula appears to be just one bright star in Orion's "sword".
Limitations
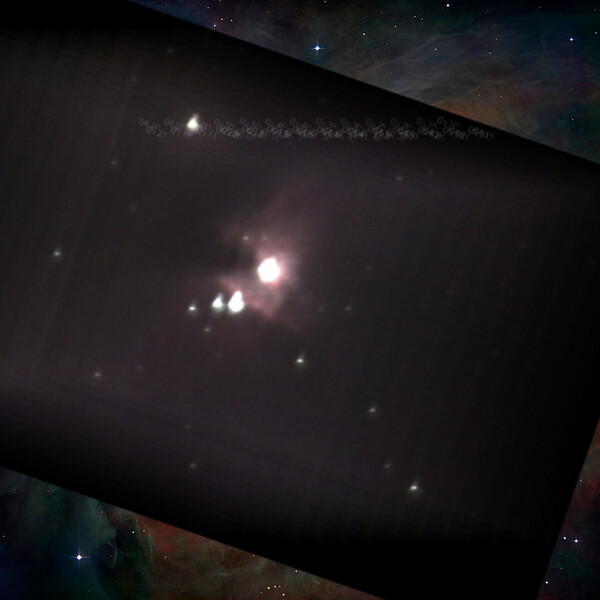
The image from my telescope is slightly wobbly while the motion tracking is operating, I believe this is because it makes the tube vibrate. I therefore only use the tracking to keep the telescope lined up with the object when preparing to take a photograph, and then turn it off to actually take the photo. To get lots of photos of the same object I use the "timelapse" mode in the interface. This results in some motion of the object from one frame to the next (because the Earth is spinning), which needs to be fixed later:
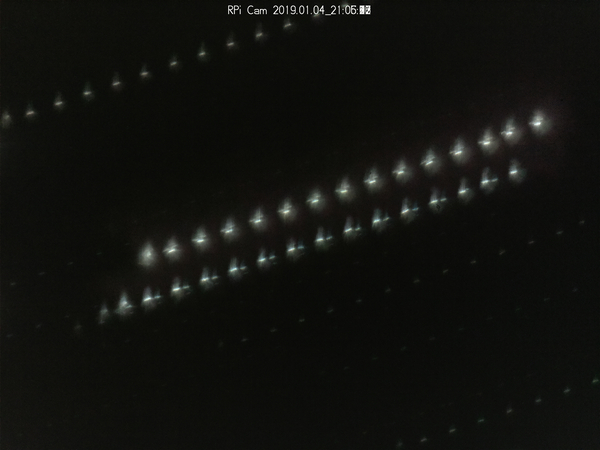
(these are 1-second exposures 5 seconds apart).
This picture also demonstrates my continued difficulties in bringing my PiKon to a sharp focus: a correctly-focused star should be a single point, whereas I have a blurry smudge.
The maximum exposure time that RPi Cam Web Interface seems to support is 1 second. The Pi camera can do a bit more, but I haven't yet worked out how to get the web interface to support it. It might require a custom compiled raspimjpeg. And at any rate, the stars are already starting to look streaky at 1 second of exposure. They'd be worse at longer exposures.
The JPEG files we get from the interface only give us 8 bits per channel of colour data. Getting RAW data with raspistill --raw seems to include 10 bits per channel, so if that's easy to use, it might be worth working out how to get raspimjpeg to include the RAW data.
The Orion nebula is about 4x larger than the PiKon field-of-view, in both axes, so ideally you would take a photograph with something that has less magnification than the PiKon. Fortunately (?) it's quite dim around the edges, so I wasn't able to see any more than the centre of the nebula anyway, which fits comfortably within the PiKon field-of-view.
Operating the telescope
I point the telescope at the object I want to look at, using Stellarium, pause tracking using my pikontroll GUI in RPI Cam Web Interface, and periodically resume and re-pause tracking whenever the object nears the edge of the view, to re-centre it in the frame. An equatorial mount would be far superior.
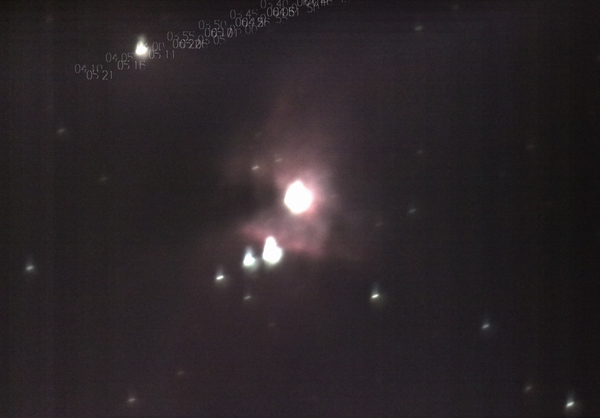
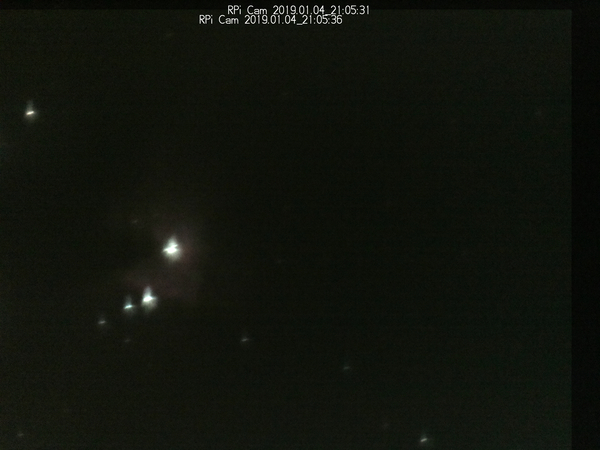
A single 1-second exposure with ISO set to 800 looked like this:
I tried various other combinations of ISO and exposure time, and this one produced the best results.
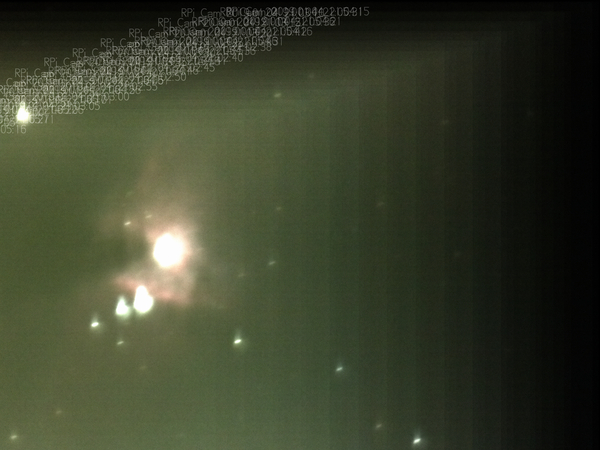
We could easily crop off (or disable) the timestamps before proceeding, but I've left them in all of the pictures because they show some interesting effects.
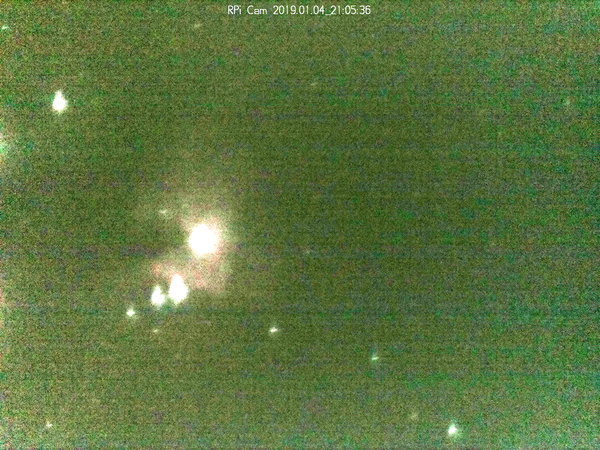
We can whack the levels up ("Colours" menu => "Levels..." in the GIMP):
(I set the maximum brightness to be at 22 out of 255, which means all pixel values get scaled by a factor of ~11.6x).
At this level we can see some detail of the nebula, but there is a lot of background noise. We also only have 23 distinct brightnesses so we've effectively only got 4.5 bits per channel. This would be substantially better if we'd started out with 10-bit colour data instead of 8-bit, but the noise would still be there.
So to improve the image, we want to stack together lots of individual exposures, in an attempt to average out noise and amplify signal.
Exposure stacking
1. Alignment
Before we can blend the exposures together, we need to align them.
To align 2 exposures, we can load them in separate layers in the GIMP, and set the top layer mode to "grain extract". This mode shows us the differences between 2 layers. It's similar to the "difference" layer mode, except it centres around middle grey instead of black so it's a bit easier to use.
The timestamps here are overlapping (and therefore invisible), but the stars are not, because the photos were taken 5 seconds apart with no tracking. As we start to move the top layer to align the stars, the timestamps separate from each other and the stars get closer:
And when we've got the layer properly aligned, the stars are almost invisible:
To align a large number of exposures, open them all with the "Open as layers..." tool, set them all to invisible except the bottom one, and then individually align each layer with the bottom layer using the "grain extract" layer mode. This takes an amount of time linear in the number of layers, but you get faster with practice. You want to make sure all layers are aligned to a single "master" layer, rather than aligning each one to the one immediately underneath it, to avoid accumulating errors.
2. Blending
With 2 layers correctly aligned, we can switch the top layer's mode from "grain extract" to "addition" to add the pixel values together (left: 1 exposure, right: 2 exposures aligned and added together):
(if you're on mobile, you'll probably have to mentally replace left/right with top/bottom).
You'll note that everything is now brighter, and there are now 2 timestamps shown.
When we have more than 2 layers, we can set all but the bottom layer mode to "addition" to add all of our layers' pixel values together. In my case, I had too many exposures for a simple addition to work well (everything was too bright), so I added a solid black layer at the bottom, and set all of the exposure layer opacities to 25%. 46 exposures multiplied by 25% opacity gives 11.5x the brightness of a single exposure, which is comparable to what we did earlier with the "Levels" tool (left), although we now get a much better image (right):
You can see the streak of timestamps which corresponds to (the opposite of) the way the sky moved in the frame.
Since most of the exposures have been dragged towards the bottom-left to align them, we've lost part of those images. We can get this back by making the canvas large enough to contain the entirety of every exposure:
Dark frames
This is the part where I'm not really sure about the terminology. I don't think what I've made is referred to as a "dark frame" by actual astrophotographers. It could just as easily be a "dark flat", "flat dark", "bias frame", or something else. I need to learn more about this.
1. Capturing images
To capture the dark frame, you just want to take a handful of pictures of dark sky, in roughly the same direction as your subject, using the same camera settings, so that you get roughly the same levels of sensor noise and light pollution. I just moved the telescope off to the side until I was convinced I was looking at black space and then took a short timelapse.
I left the tracking on while taking these photos because I didn't want any stars to drift into the view, but this turned out to be a mistake. The best thing to do is leave tracking off, and leave a timelapse running for a while. Later on, just throw away any exposures that include stars and only use the "good" ones to make the dark frame. Even if you have some dim stars, they shouldn't affect the final dark frame if tracking is off, because they'll be in a different position each time.
2. Blending
Much like exposure stacking, open the dark frames with "Open as layers" in the GIMP. These layers don't need any alignment because they should all be completely black. (Delete any layers which are not completely black).
Set all but the bottom layer mode to "darken only". This will result in an output image that shows, at each pixel, the minimum intensity that we observed when imaging completely black sky. This encodes information about both sensor noise and light pollution, and we can use it later to remove sensor noise and light pollution from our individual exposures of the nebula. If you want to remove noise more aggressively you could try using "lighten only" mode, but I found that this was too aggressive and removed too much detail.
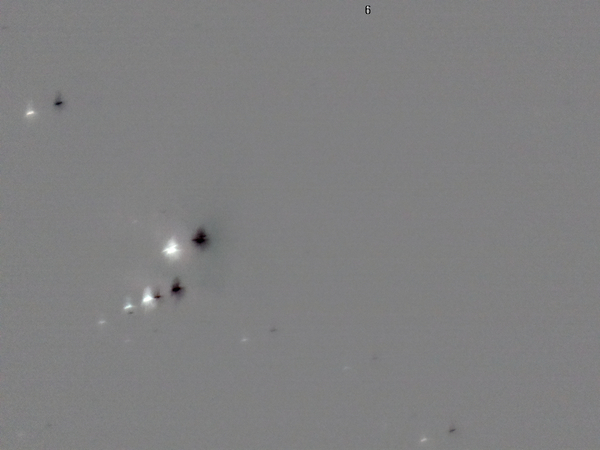
Here's the dark frame I ended up with (actual on the left, exaggerated on the right):
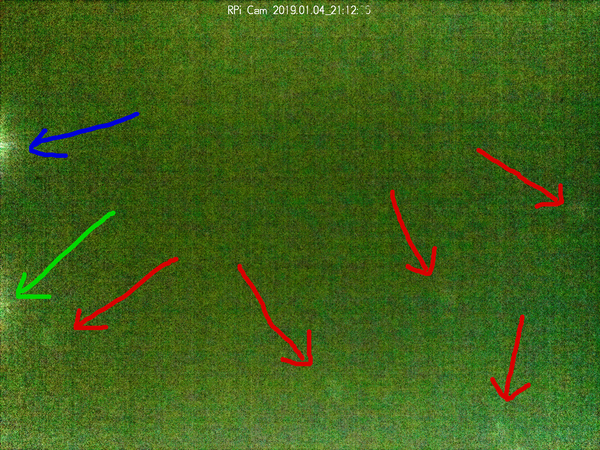
Things to note include:
- Red arrows: there are some stars faintly visible! This is a mistake. If I knew there were stars in the view I would have pointed the telescope somewhere else. And if I'd had motion tracking turned off, the "darken only" layer mode would have been able to scrub out the stars.
- Blue arrow: there is a bright spot at the edge. This is always present in the Pi camera, so we do want to remove it from our actual photos. I believe it is caused by some component on the PCB next to the sensor that heats up part of the sensor.
- Green arrow: there is another, slightly dimmer, spot at the edge. I've not noticed this in the past when playing with photos from the Pi camera so I'm not sure what it is. Most likely it's the same sort of thing as the blue spot. Regardless, it seems to be present in the actual frames as well, so we want to remove it, which means we do want it in the dark frame.
- The timestamp is mostly still present, although if you zoom in you'll see the "seconds" digits are partly removed. This means we'll remove most of the timestamp text from the actual photos, where the characters are the same.
3. Subtracting dark frames from nebula exposures
To subtract the dark frame from another exposure, we simply place the dark frame in the layer above it and set the dark frame's layer mode to "subtract".
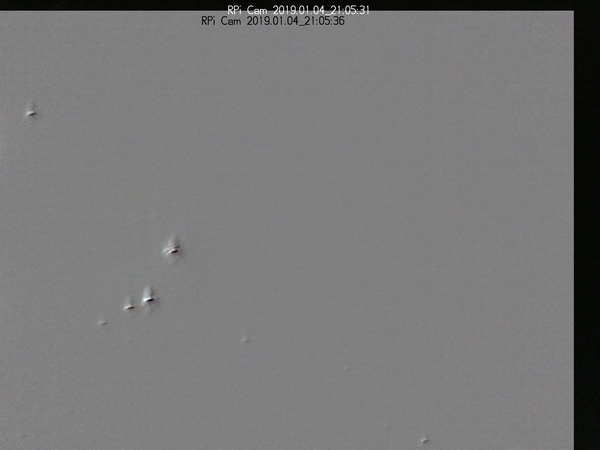
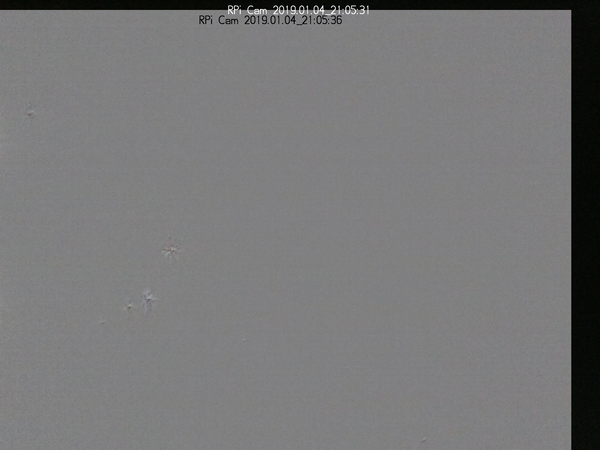
Here's an original exposure (left), compared to the same exposure with the dark frame subtracted out (right):
Both have been exaggerated by the same amount using the "Levels" tool (with max. set to 22, so ~11.6x brighter).
The primary effect is reducing the visibility of light pollution (i.e., it makes the background darker). We've got rid of some noise (the vertical streaks are less pronounced, at least), but not as much as I had hoped. Side effects are that we've introduced some faint dark spots where there were stars in the dark frame, and we've blacked-out most of the timestamp text.
Exposure stacking with dark frames
To subtract the dark frame from all of the individual stacked exposures (as opposed to just one), we can use the GIMP's "layer group" feature. We want to make 1 layer group for each of the nebula exposures, and inside each layer group we want to have the nebula exposure on the bottom layer, and the dark frame above it:
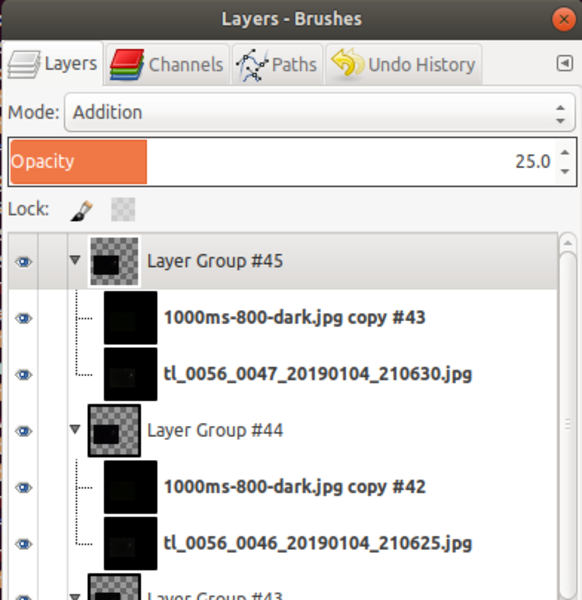
The nebula exposures are all aligned to the bottom-most exposure, and the dark frames are all aligned to the corresponding nebula exposure.
The nebula exposures are set to layer mode "normal", and 100% opacity. The dark frames are set to layer mode "subtract" and 100% opacity, and the layer groups are set to layer mode "addition" and 25% opacity. At the very bottom of the whole stack there is a single black frame at 100% opacity.
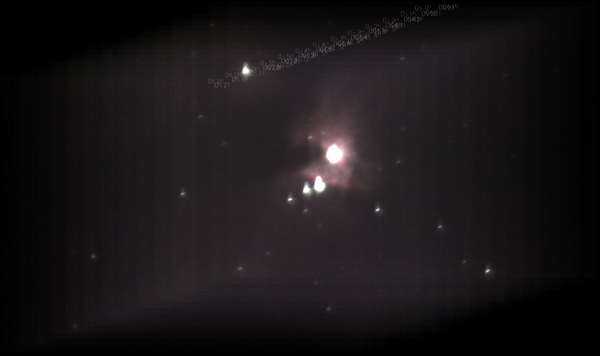
Setting all this up 46 times is quite laborious, and if I do much more of it I intend to make some GIMP scripts to automate parts of the process. Once all the layers are aligned correctly and in the correct mode and opacity, we're done. We can compare our result from exposure stacking alone (left) to our final result incorporating dark frame subtraction (right):

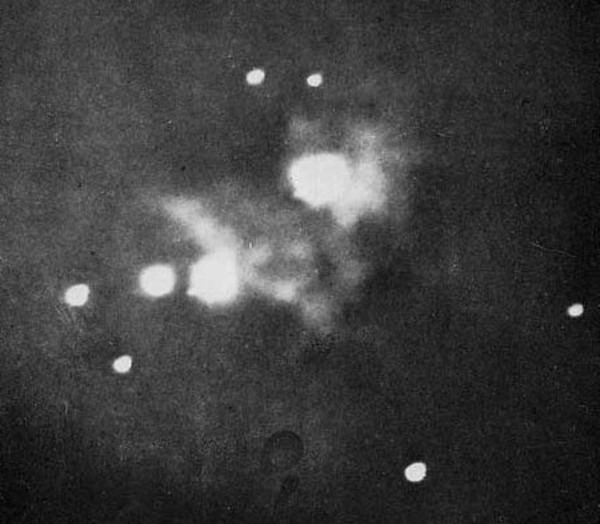
For comparison, here is the first ever photograph of the Orion nebula, taken in 1880 by Henry Drape:
And to see just how much extra detail is really there, here's an image of the Orion nebula taken by the Hubble space telescope over the course of 105 orbits of the Earth (left), and the same image, but with my image aligned to match (right):