
As a teenager, I wrote a C program to do image steganography. It hid the secret image in the least significant bits of the cover image. I also made a PHP web interface to it, which now sees about 3,000 users per month. So I've made a better version, it gives previews of the input images, doesn't upload the images to my server (privacy, yo), and is faster.
The new version is implemented in Javascript and runs in the browser.
It's not supposed to be useful, just a bit of fun. The kind of steganography this tool does is easily defeated by basic analysis of the least significant bits, which is what I want to talk about now.
An arbitrary photograph, encoded in a bitmap format, would have increasingly-random variation as you move from the most significant bits to the least significant. But if a black and white image of some text were hidden there, the least significant bit would instead have large blocks of identical bits (for black sections and white sections), and almost no variation.
We can take the value of the 1st bit, 2nd bit, etc. to create 8 pictures of the different "bit planes" in the image. Here is an example shamelessly taken from the Wikipedia article on bit planes (this is greyscale, but we can do the same for colour images):
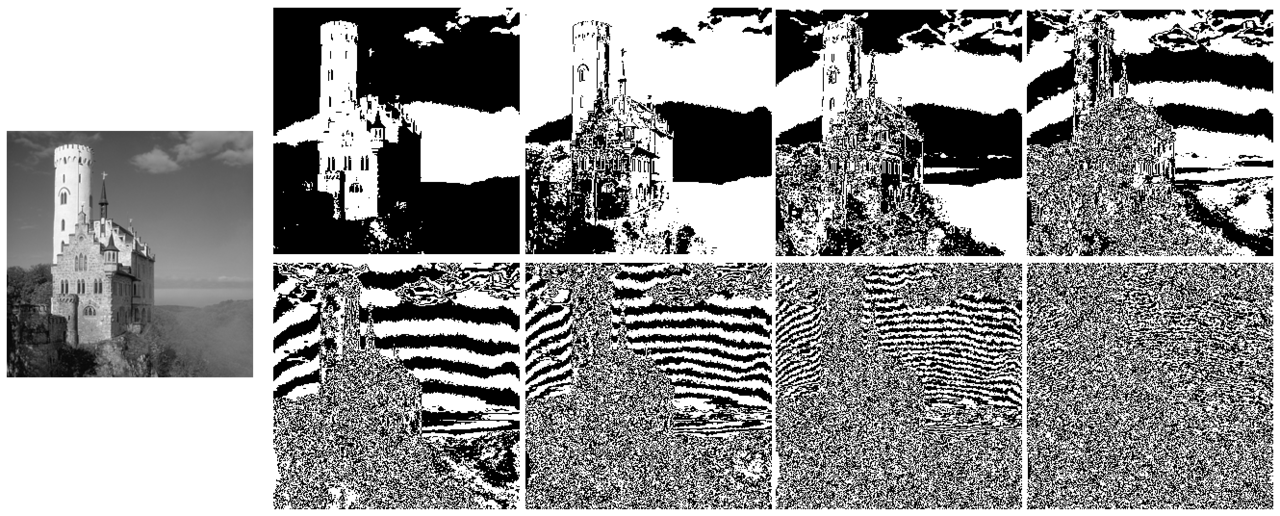
The lower right panel is the least significant bit and is indeed pretty random-looking.
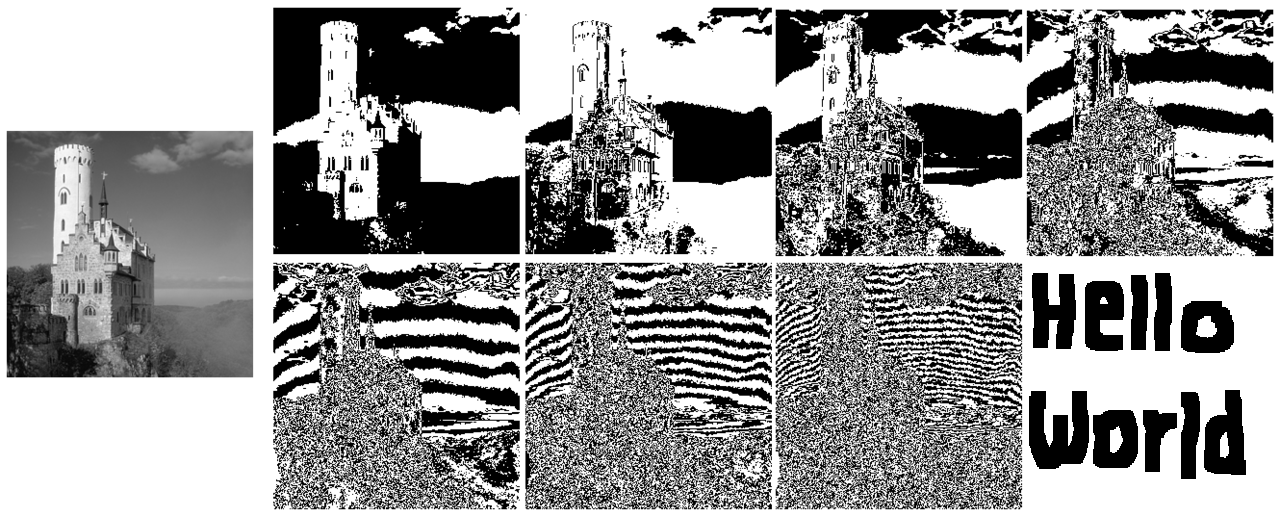
If we had a black and white message hidden in the least significant bit, it would look like this (the most significant bit planes are unchanged, so the output image appears the same):
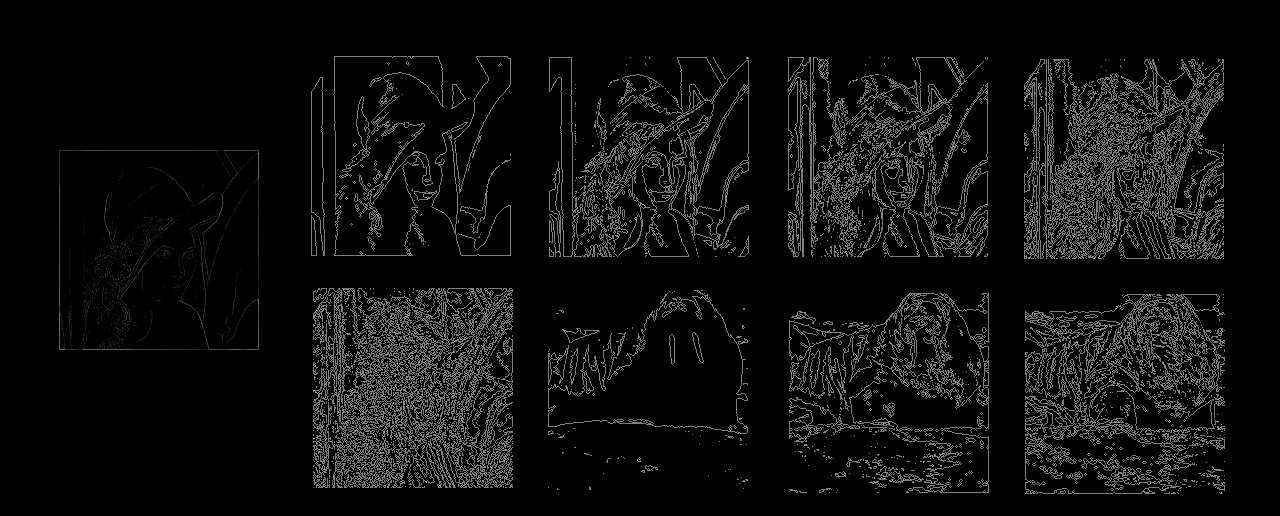
We can perform edge detection on the bit planes:
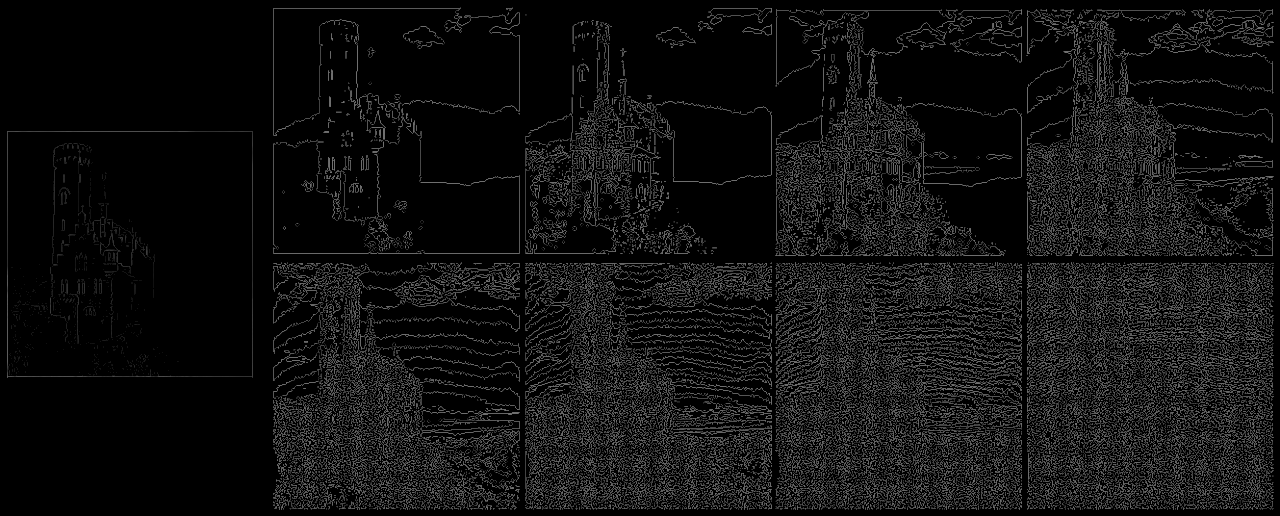
vs.

If we then sum the pixel values in each bit plane after edge detection, we get a value that roughly corresponds to how much noise there is. We can see that, in general, each bit plane has more noise than the one that came before it, except when there is a steganographically-hidden image.
This reveals a simple algorithm for detecting steganography:
1.) Split the image into its 8 bit planes
2.) Perform edge detection on each bit plane to get edge detection output
3.) Sum the pixels of each edge detection output to get a quantifier for the amount of noise
4.) Starting at the most significant bit and working down: if any plane has less noise than the one that came before it, this is a good candidate for being a steganographically-hidden image.
It is also relatively easy to see that if a photograph (rather than a block of text) were hidden in the same manner, this algorithm still has a good chance of working. Here are the bit planes for a Walrus hidden in Lena:
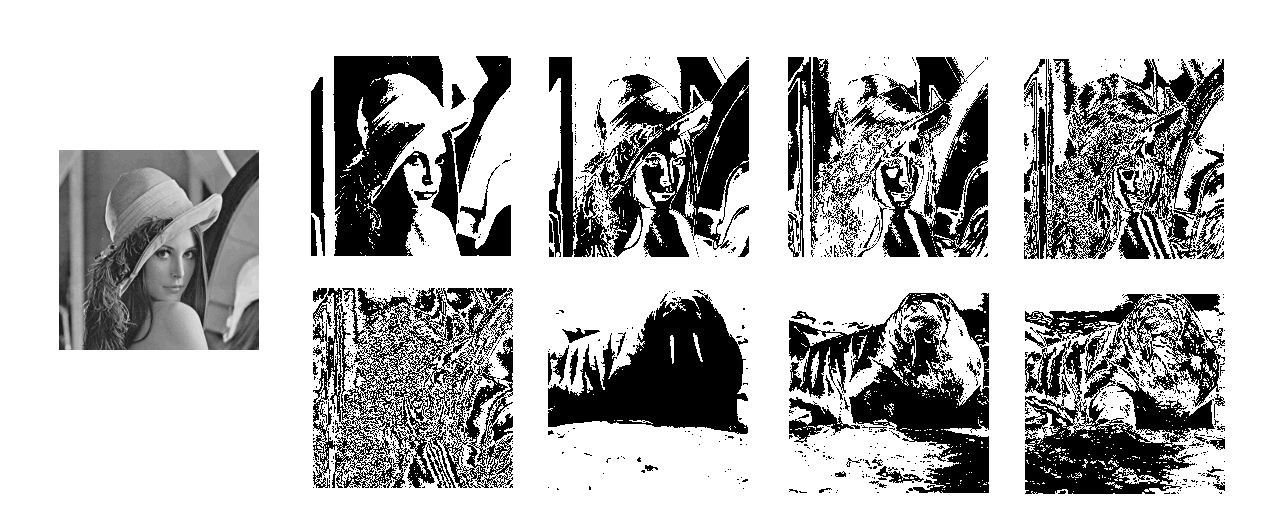
And after edge detection:
The first bit plane of the walrus is much less noisy than the last bit plane of Lena.
If you want to play with my steganography tool, here is the link again.
If you want to talk about steganography, please get in touch: james@incoherency.co.uk.