
A drag engraver is a very sharp spring-loaded tool that you can hold in a CNC spindle and drag over a piece of metal to engrave fine lines.
Mine looks like this:
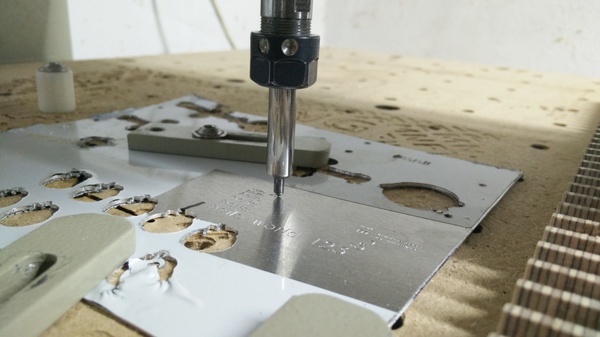
It has a piece of diamond at the tip.
You don't turn the spindle motor on, you're just using the spindle to hold the tool. Being spring-loaded means it conforms to slightly out-of-level surfaces while maintaining almost constant pressure.
Ring
Yesterday I used the drag engraver with my weird rotary axis to engrave a commemorative ring I made for an upcoming special occasion. The quality of the engraving was much better than I expected, so I want to do more of it.
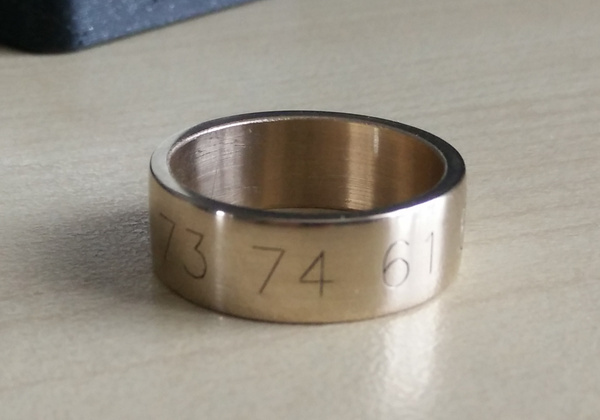
I want to make a ring that has a huge amount of tiny text engraved on it, but first I need to know how small I can make the text before it becomes illegible.
Test card
I drew up a little test card in Inkscape:
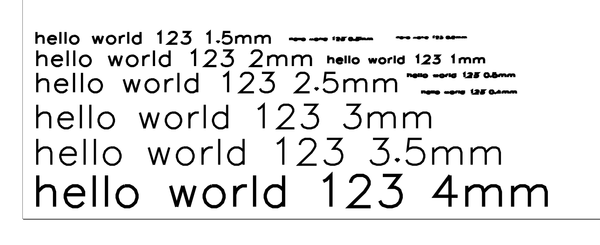
This has text from 4mm down to 0.5mm in 0.5mm steps, and then down to 0.2mm in 0.1mm steps.
(Incidentally, I find Inkscape very annoying to use for engraving toolpaths, because Inkscape includes the thickness of a line in its dimensions. This means when you resize a piece of text to be 4mm tall, you actually end up slightly under-size, because the thickness of the line is included in the "4mm" measurement).
This text is generated with the "Hershey Text" plugin using the "Sans 1-stroke" font.
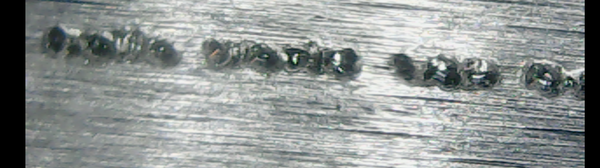
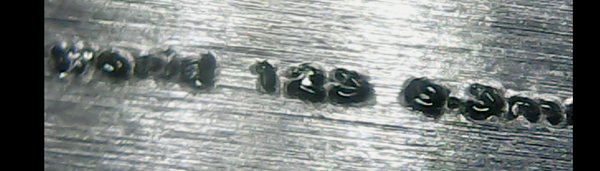
I engraved it on an offcut of 1mm aluminium sheet with the CNC machine:
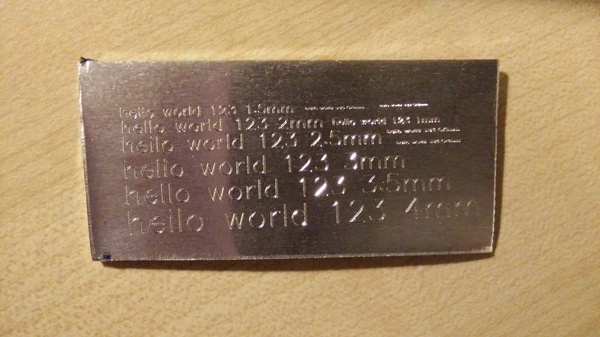
(It turns out it's quite hard to take a picture of a very shiny piece of metal - the text is much easier to read in-person).
The aluminium sheet is a much softer material than the ring. I don't actually know what metal the ring is made of, it's some surprisingly-hard type of brass or bronze. It was a small piece of scrap left in my garage by the previous owner of the house.
Due to the softness of the aluminium, the engraved lines on my test piece are quite a bit deeper than on the ring, which tends to make the smaller text harder to read because adjacent lines blend into each other.
Conclusion
All sizes from 1mm and up are legible.
I reckon 0.5mm is legible if you squint. 0.4mm and 0.3mm are legible without magnification only if you already know what the text says. I don't consider 0.2mm legible even though I know what it says.
Given that the lines we'd get on the ring will be thinner, I think it is safe to go below 1mm. Possibly I'd suggest 0.6mm just to be on the safe side.
Under the microscope
Just for fun I took some pictures with the USB microscope:
0.2mm:
0.3mm:
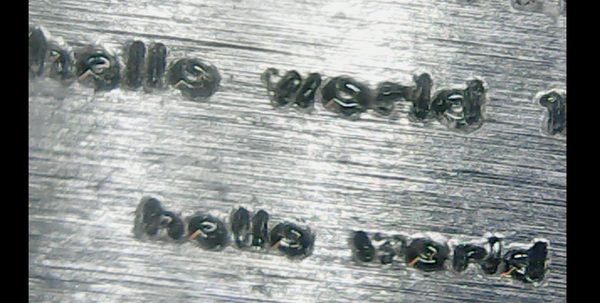
0.4mm and 0.5mm:
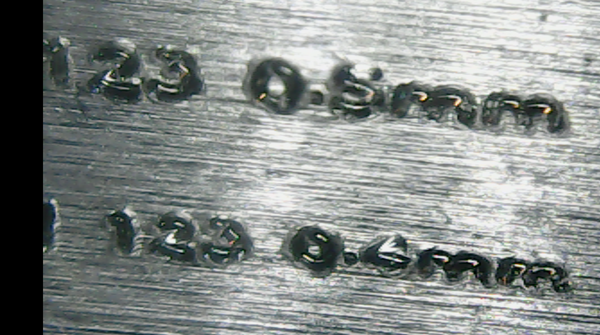
0.4mm and 0.5mm again:
Drag-engraved PCBs
I have made a circuit board with isolation routing before, but I found it very difficult. In total I have had maybe 7 attempts at making PCBs with isolation routing, with only the 1 success.
The major problems I had were:
- the surface is never truly flat, which means the cut depth is different in different places; it might cut so deep that it obliterates your trace in one area, while it's not even isolating the traces in another
- the width of the cut is too big because the tiny v-bit tools are rarely concentric enough
You can solve the flatness problem by probing the surface and correcting for its shape, but I haven't established a good workflow for that. I'm told that bCNC is the tool to use, but haven't got around to trying it yet.
I have quite a lot of fine-tipped v-engraving bits, but I have broken the one I used to create the successful PCB. All of the others, despite having very thin and precise tips, are not concentric, which means the tip spins around in a big circle and routes a slot much bigger than the size of the tool. Buying more expensive tools would probably help, but I break them so frequently that I'm not prepared to pour more money into them.
Anyway, my big idea here is to try using the drag engraver to do the isolation routing! It kills both birds with one stone: it automatically corrects for an out-of-level surface because it's spring-loaded, and it gives you an extremely thin cut because it's not spinning.
As long as the drag engraver can provide enough pressure to cut all the way through the copper I don't see what could go wrong. So I plan to try this tomorrow.